The Science Behind Japanese Straightening
Japanese straightening, often called thermal reconditioning, is more than just a smoothing treatment. It's a permanent change to your hair's structure at the molecular level. This process breaks and reforms the disulfide bonds within the hair shaft, responsible for your hair's natural curl. This differs significantly from temporary solutions like keratin treatments.
Keratin treatments coat the hair, reducing frizz and relaxing curl, but these effects wash out over time. Japanese straightening, however, delivers dramatic, long-lasting results because of this core difference.
Understanding the Chemical Process
The core of Japanese straightening lies in a cysteine-based solution. This solution breaks down the disulfide bonds, allowing the hair to be reshaped. This is where the "thermal" aspect of thermal reconditioning comes into play.
A flat iron, heated precisely, straightens each hair section. The heat restructures the broken disulfide bonds into a new, straight configuration. The entire process is highly technical. Japanese straightening permanently alters the internal bonds of curly or frizzy hair. This transforms it into straight strands.
Unlike keratin treatments, which temporarily soften curls and reduce frizz, Japanese straightening produces permanent results. This is achieved using a cysteine-based chemical solution to break down the hair structure and then reshape it with heat from a flat iron. The treatment usually takes about four hours, and results last six to eight months. In the U.S., prices typically start around $250. It is generally considered safer than traditional relaxers containing sodium hydroxide. Learn more about Japanese straightening facts here. Improper application can cause damage, making professional expertise crucial. Achieving salon-quality results at home requires meticulous preparation and careful execution. You might also be interested in additional resources on Japanese products.
Why Professional Expertise Matters
The precision required for the chemical application and the heat styling makes Japanese straightening complex. The process begins with assessing the hair's condition, including porosity, damage history, and past chemical treatments. To maintain your straight hair, you might consider other services, like exploring new hair color trends.
This evaluation guides the choice of straightening solution strength and the flat iron temperature. Achieving straightness without damage requires a delicate balance. This involves understanding the science and extensive practice. While attempting Japanese straightening at home is possible, proceed with caution and thorough preparation.
Is Your Hair Ready for DIY Japanese Straightening?
Before you try Japanese straightening at home, it's essential to determine if your hair is suitable. This involves more than just knowing your hair type (curly or straight). A careful evaluation, considering your hair's history and current condition, will help you achieve the best results and minimize potential damage.
Evaluating Your Hair's History
Think of your hair like a canvas. A fresh canvas takes color beautifully, while a damaged one might not. Past chemical treatments, such as coloring or relaxing, significantly affect how your hair reacts to Japanese straightening. These treatments alter your hair's structure and overall strength.
Frequent heat styling can also weaken your hair, making it prone to breakage during the straightening process. Honestly assessing your hair's history is the first step in deciding if DIY Japanese straightening is the right choice. This sets the stage for a safe and successful treatment.
Assessing Current Hair Health
Your hair's current health is just as important as its history. Porosity, your hair's ability to absorb moisture, is key. Highly porous hair, often a result of damage, may absorb the straightening solution unevenly. This can lead to inconsistent results.
Structural integrity is another crucial factor. If your hair already breaks easily or has split ends, Japanese straightening could worsen these problems. Weak hair may not be able to handle the chemical processing and heat styling involved.
Hair Type Suitability
Some hair types generally respond better to Japanese straightening. Virgin hair, hair that hasn't been chemically treated, reacts most predictably. Hair with a medium texture usually yields excellent results. It’s strong enough to withstand the treatment but pliable enough to be reshaped. However, very fine or coarse hair requires special care.
To help you determine if your hair type is suitable for DIY Japanese straightening, we've created a helpful table below. It outlines the suitability, risk levels, expected results, and special considerations for various hair types and conditions.
Hair Type Suitability for At-Home Japanese Straightening:
| Hair Type/Condition | Suitability | Risk Level | Expected Results | Special Considerations |
|---|---|---|---|---|
| Virgin Hair | Excellent | Low (with proper technique) | Consistent straightening | Ideal candidate |
| Color-Treated Hair | Moderate | Medium | Straightening may be less effective or last a shorter duration | Requires a gentler approach |
| Chemically Damaged Hair | Low | High | Potentially uneven results, increased breakage | Not recommended |
| Fine Hair | Moderate | Medium | Straightening possible, but risk of over-processing | Use lower concentrations and temperatures |
| Coarse Hair | Moderate | Medium | May require multiple passes with the flat iron, increasing risk of heat damage | Careful monitoring and temperature control are crucial |
As shown in the table, virgin hair is the most suitable for this treatment, while chemically damaged hair is not recommended. Color-treated, fine, and coarse hair types require a moderate level of caution and specific techniques. Understanding these nuances is vital for a successful outcome.
By carefully considering your hair's history, current health, and type, you can decide whether at-home Japanese straightening is right for you. If you're unsure, consider alternative methods. Thorough preparation will help you achieve the desired results while minimizing damage. You can also find additional Japanese hair products at Buy Me Japan.
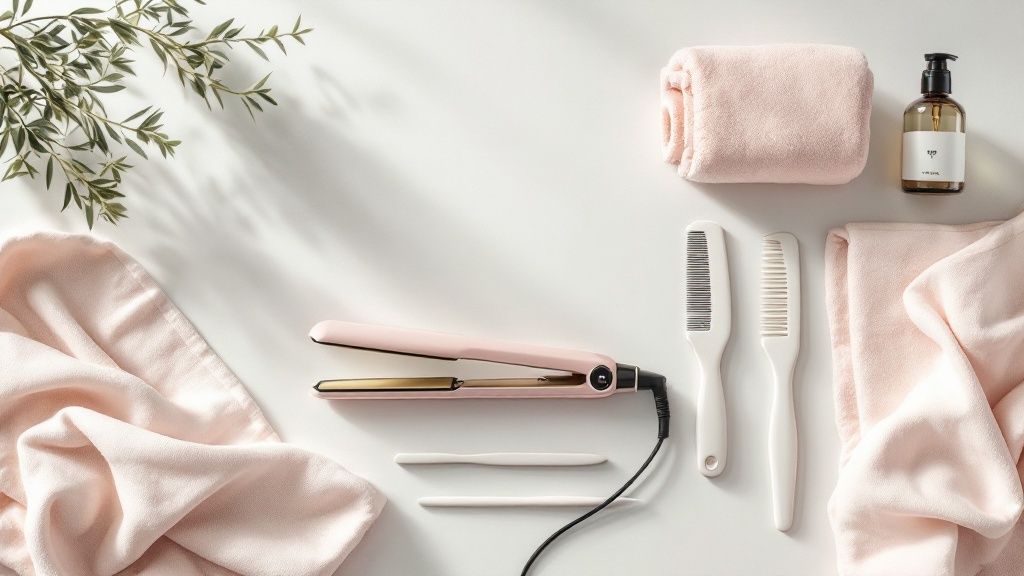
Building Your Professional-Grade Toolkit
Achieving salon-worthy Japanese straightening at home requires the right tools and products. This isn't just about any flat iron and straightening balm; it's about building a professional-grade kit for safety and effectiveness. Investing in quality products replicates the salon experience at home.
Choosing the Right Straightening System
The core of your toolkit is the Japanese straightening system. Look for consumer-friendly options that mirror professional formulas. Recognizable brands known for quality often surpass generic alternatives.
Consider the straightening solution's strength. This depends on your hair type and texture. Thicker or coarser hair might need a stronger solution, while finer hair benefits from a gentler formula to prevent damage. Buy Me Japan offers a range of high-quality Japanese hair products.
Investing in a Professional Flat Iron
A standard flat iron isn't suitable for Japanese straightening. You need a high-quality, temperature-controlled ceramic or titanium flat iron. This precise heat application restructures hair bonds without excessive damage.
Look for adjustable temperature settings and plates that distribute heat evenly, minimizing hot spots and ensuring uniform straightening. The plate width should also match your hair length: wider plates for long hair and narrower for short hair.
Essential Accessories and Protective Gear
Besides the system and flat iron, specific accessories are essential for safety and effective application.
-
Application Tools: Use non-metallic bowls and applicators to mix and apply the solution, preventing chemical reactions that can affect the treatment.
-
Protective Equipment: Gloves and a mask are vital to protect your skin and lungs from the strong chemicals.
-
Neutralizing Products: A neutralizing shampoo and conditioner are essential to stop the chemical process after straightening and restore your hair’s pH balance.
Building Your Shopping List: Quality Meets Accessibility
It’s important to understand market trends for at-home hair treatments. Despite the hair straightening industry's overall growth (with nearly 70,000 workers in the U.S. in 2018, projected to grow by 6.5% by 2028), at-home use has declined since the 1990s. Safety concerns about chemicals like formaldehyde, often found in keratin treatments and other straightening products, have led many to seek professional salon services. This underscores the importance of choosing products carefully and following safety guidelines when attempting Japanese straightening at home. Learn more here.
Having the right tools and products sets the stage for successful Japanese straightening at home. This careful preparation allows you to begin the process confidently, maximizing your chances of beautiful, lasting results. Buy Me Japan offers various Japanese straightening products at different price points. This helps you build a complete shopping list that balances quality and affordability. Remember, investing in professional-grade tools benefits your hair's health and ensures a salon-worthy finish in the long run.
Your Step-by-Step Japanese Straightening Roadmap

Now that you've gathered your professional tools, let's explore the step-by-step process of Japanese straightening at home. This detailed guide, drawing inspiration from professional salon techniques, will lead you through each stage, ensuring a smooth and successful hair transformation.
Pre-Treatment Preparation: The Foundation for Success
Before you begin applying any chemicals, preparing your hair correctly is essential. Start by using a clarifying shampoo. This will remove built-up product, excess oils, and impurities. This step ensures the straightening solution penetrates the hair shaft evenly for optimal results. Think of it like preparing a canvas before painting—a clean surface is key.
Next, perform a strand test. Apply a small amount of the straightening solution to a hidden section of your hair. This simple test predicts how your hair will react to the treatment and allows you to adjust the processing time as needed. This precautionary measure can prevent any unwanted surprises.
Application and Processing: Precision is Key
Divide your hair into small, manageable sections. Applying the straightening solution methodically to each section ensures even saturation. Start at the roots and work your way down to the ends, like applying paint with careful strokes. This precise application is crucial for uniform straightening.
Professional stylists meticulously time the processing phase. Follow the instructions included with your specific straightening system carefully. Over-processing can lead to damage, while under-processing may result in ineffective straightening. Proper timing is essential for achieving the desired straight look.
Rinsing and Neutralizing: Stopping the Chemical Process
Once the processing time is complete, rinse your hair thoroughly with lukewarm water. This crucial step stops the chemical reaction. Ensure all traces of the solution are gone, as any remaining residue can continue processing your hair and cause damage.
After rinsing, apply a neutralizing solution. This important step restores your hair’s pH balance and halts the chemical process completely, acting as a protective barrier against further chemical alteration.
Flat Ironing: Reshaping Your Hair's Structure
Now for the "thermal" component of thermal reconditioning. With your professional flat iron, straighten each section of your hair methodically. The heat restructures the hair bonds, setting the straight shape. This stage requires patience and a precise technique.
Maintain consistent tension and speed as you glide the flat iron through each section. Avoid lingering on any one spot, as this can cause heat damage. Consistent technique is essential for even results.
Post-Treatment Care: Protecting Your Investment
To help you understand the timeframe involved, here's a handy table outlining each step of the process:
Japanese Straightening at Home Timeline:
| Process Step | Estimated Time | Critical Factors | What To Watch For |
|---|---|---|---|
| Pre-Treatment Preparation | 30 minutes | Thorough cleansing, accurate strand test | Uneven product buildup, adverse reaction during strand test |
| Application and Processing | 1-2 hours | Even saturation, precise timing | Uneven application, over-processing |
| Rinsing and Neutralizing | 30 minutes | Complete removal of solution, proper pH restoration | Residue of solution, incomplete neutralization |
| Flat Ironing | 1-2 hours | Consistent temperature, tension, and speed | Heat damage, uneven straightening |
| Post-Treatment Care | Ongoing | Gentle handling, specialized products | Breakage, frizz, reversion to natural texture |
The first 72 hours after the treatment are crucial. Avoid washing, wetting, or tying up your hair during this period. This allows the newly restructured bonds to set properly. Imagine letting concrete dry before walking on it—disturbing your hair too soon can compromise the results.
Use sulfate-free shampoos and conditioners specifically designed for chemically treated hair. These products maintain your hair's moisture balance and help preserve the straightened effect. Find suitable hair care products at Buy Me Japan. Maintaining your salon-straight hair requires ongoing care and the use of specialized products. You can find additional Japanese hair care products on Buy Me Japan. Consider exploring natural remedies for anxiety, as managing stress can also contribute to overall hair health. By diligently following these steps, your at-home Japanese straightening experience can yield stunning, long-lasting results.
Protecting Your Health During Chemical Processing
Japanese straightening can dramatically transform your hair, but it involves powerful chemicals that demand careful handling. Replicating the safety standards of a professional salon at home is essential to protect your well-being. This includes proper ventilation, using the right protective gear, and knowing how to recognize potential hazards.
Ventilation: Protecting Your Respiratory System
Professional salons prioritize good ventilation to minimize exposure to chemical fumes. At home, ensure adequate airflow. Open windows and use fans to circulate the air. Ideally, do your treatment in a well-ventilated space, preferably near an open window. This will help dissipate fumes and prevent you from inhaling potentially harmful chemicals. It's much like painting with strong solvents—fresh air is key for your safety.
Protective Equipment: Shielding Your Skin and Eyes
Just as stylists wear gloves and masks, you should too. Gloves protect your skin from coming into direct contact with the chemicals, preventing irritation and possible burns. A mask is equally important, filtering out airborne particles and fumes to safeguard your respiratory system. This professional-level protection is crucial for safe DIY Japanese straightening.
Patch and Strand Tests: Preventing Allergic Reactions
Before applying any chemical treatment, professionals perform patch and strand tests. A patch test helps identify any allergic reactions you might have to the solution. Apply a small amount to your inner wrist and wait 24 hours, checking for any redness or irritation. A strand test, as discussed earlier, helps you figure out the right processing time and predict how your hair will react to the chemicals. These simple precautions can prevent significant issues.
Recognizing Warning Signs and Emergency Protocols
Even with careful preparation, you might still experience an adverse reaction. Burning sensations, excessive itching, or difficulty breathing could indicate chemical irritation or an allergic reaction. If any of these occur, immediately rinse your hair with cool water and get some fresh air. If symptoms persist, contact a medical professional. Being prepared for these situations is critical.
Proper Storage and Disposal: Protecting Your Household
Salon professionals follow strict guidelines for chemical storage and disposal. You should too. Store your straightening solution in a cool, dry location, away from children and pets. Dispose of any unused chemicals and contaminated materials according to your local regulations. You might find this interesting: How to master Japanese beauty product shopping. Responsible handling protects your home and the environment.
Special Considerations: Protecting Vulnerable Individuals
Pregnant women, people with respiratory conditions, and those with sensitive skin or scalps should talk to a doctor before trying Japanese straightening at home. These groups may be more susceptible to adverse reactions from the chemicals used in the process. Prioritizing your health and seeking professional medical advice is essential.
There are understandable health concerns associated with hair straightening chemicals, including those used in Japanese straightening. A study by the National Institutes of Health (NIH) found that women who frequently used hair straightening products (more than four times a year) doubled their risk of developing uterine cancer compared to those who didn't use these products. Read the full research here.
By following these safety precautions, you can enjoy the benefits of Japanese straightening at home while minimizing potential risks. Remember, your health and safety should be your top priority throughout the entire process.
Maintaining Your Salon-Perfect Straight Hair
The intensive process of Japanese straightening at home might be complete, but your journey to maintaining perfectly straight hair is just beginning. Think of it like investing in a beautiful new car – regular maintenance is key to preserving its pristine condition. Similarly, your newly straightened hair requires specialized care to keep its sleekness and shine.
Specialized Aftercare: The Key to Longevity
Just as you wouldn't use harsh detergents on delicate fabrics, you shouldn't use conventional hair products on your Japanese straightened hair. These products can strip the treatment, causing your hair to revert to its natural texture. Instead, opt for sulfate-free shampoos and conditioners designed for chemically treated hair. These gentler products maintain crucial moisture balance and protect the newly restructured bonds. For a wide selection of Japanese hair products, check out Buy Me Japan.
Washing Techniques: Less Is More
The first 72 hours after treatment are crucial. Avoid washing, wetting, or even tying up your hair. This allows the restructured bonds to set, maximizing the treatment's longevity. After this initial period, reduce your washing frequency. Over-washing can strip the treatment and dry out your hair. Maintaining healthy hair also involves managing stress; for more information, explore natural remedies for anxiety.
Heat Styling and Other Considerations
While your hair is now naturally straight, you might still use heat styling tools occasionally. Remember, your hair is more vulnerable to heat damage after Japanese straightening. Always use a heat protectant spray before styling, and choose the lowest effective heat setting. Also, take care when swimming. Chlorine can damage treated hair and reverse the straightening effects. Wear a swim cap for protection or rinse your hair thoroughly with fresh water immediately after swimming.
Managing New Growth: A Seamless Transition
As your hair grows, you'll notice a texture difference between the new growth and the straightened lengths. This can create an awkward transition. To manage this, consider styling techniques that blend the two textures, such as loose waves or braids. Buy Me Japan might offer some hairstyle inspiration. When the new growth becomes too noticeable, a touch-up is needed. However, avoid frequent touch-ups to prevent damage. Ideally, wait at least six months between treatments.
Ready to enhance your hair care routine with Japanese beauty products? Visit Buy Me Japan for a curated selection of high-quality products designed to maintain your stunning, salon-perfect straight hair.

Share:
Elevate Your Dishes with Low Sodium Miso Paste
7 Delicious Matcha Recipes for Weight Loss