
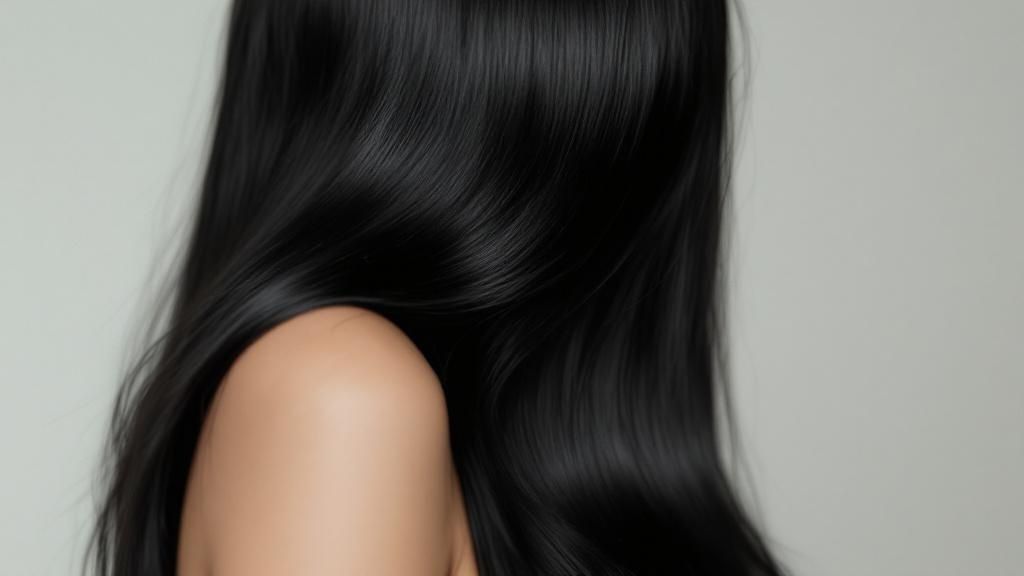
Yes, you absolutely can do Japanese hair straightening at home. But let’s be clear: this is a permanent chemical process, not just a fancy styling session. It demands a serious look at your hair's current health and a real commitment to following every single step with precision. You're aiming for that flawless, glass-like finish, and cutting corners is the fastest way to cause serious damage.
This isn't a temporary fix; it's a long-term transformation. To get it right, you need to be the right candidate with the right mindset.
Is DIY Japanese Hair Straightening Right for You?
Before you even think about opening a bottle of straightening solution, you need to have an honest chat with your hair. The dream of permanently sleek, frizz-free locks is incredibly tempting, but doing this at home is a major chemical undertaking. Your success entirely depends on starting with a healthy foundation.
This process, sometimes called thermal reconditioning, works by permanently breaking down and rebuilding the disulfide bonds inside your hair. Essentially, you're restructuring your hair's internal architecture, changing it from curly or wavy to pin-straight. Because it's a permanent change, there's no going back once it's done—the hair you treat will stay straight forever.
Identifying the Ideal Hair Candidate
Not all hair can handle this intense treatment. The best results—and the safest outcomes—are seen on hair that is strong, healthy, and hasn’t been put through a lot of chemical processing. If your hair fits one of these descriptions, you’re probably in the clear:
- Virgin Hair: Hair that's never been colored, bleached, or chemically treated is the absolute best-case scenario. It’s the perfect blank canvas.
- Minimally Processed Hair: If you have a single-process color but your hair is otherwise in great shape, you could still be a good candidate.
- Strong, Resilient Curls or Waves: Those with healthy, coarse, and unruly hair often see the most jaw-dropping transformations.
On the flip side, some hair types need to stay far, far away from a DIY straightening kit. Trying this on already compromised hair can lead to what stylists call a "chemical haircut"—and trust me, it’s not a good look.
Critical Warning: If your hair is heavily bleached, full of highlights, previously relaxed, or just showing obvious signs of damage (think major split ends, a gummy feel when wet, or extreme dryness), this treatment is not for you. The chemicals can, and likely will, cause severe, irreversible breakage to already weakened hair.
To make it even clearer, I've put together a quick checklist to help you gauge whether your hair is up for the challenge.
Hair Type Suitability Checklist
This table is your quick reference to help you decide if your hair is a good candidate for this at-home treatment. Be honest with your answers here!
| Hair Condition | Suitability Level | Key Considerations |
|---|---|---|
| Virgin (Untreated) | Excellent | This is the ideal starting point. Your hair has its full strength and integrity. |
| Single-Process Color | Good (with caution) | Hair must be healthy and strong. Always perform a strand test. |
| Healthy, Coarse Waves/Curls | Good | Often sees the most dramatic results. Ensure hair is well-moisturized beforehand. |
| Fine or Thin Hair | Fair | Risky. Fine hair is more fragile and can be easily over-processed. Proceed with extreme caution. |
| Bleached/Highlighted | Not Recommended | The risk of severe breakage is extremely high. Do not attempt this at home. |
| Previously Relaxed Hair | Not Recommended | Applying a thio-based straightener over a hydroxide relaxer will destroy the hair. |
| Damaged/Brittle | Not Recommended | This process will only worsen the existing damage, leading to catastrophic breakage. |
Ultimately, if you have any doubts after reviewing this, it's always safer to consult a professional.
The Non-Negotiable Strand Test
If there is one step you absolutely cannot skip, it’s the strand test. This isn't just a friendly suggestion; it’s your personal crystal ball. It will show you exactly how your hair is going to react to the chemicals and heat, helping you dodge a full-blown hair disaster.
To do a strand test, you'll run through the entire two-step process on a small, hidden piece of hair, maybe from the nape of your neck. This little trial run tells you two critical things: whether your hair can handle it without snapping off, and the precise amount of time you need to leave the solution on for your specific hair texture. Seriously, skipping this is the biggest mistake you could possibly make.
Setting Realistic Expectations
The world of at-home beauty has exploded, and it's fantastic. In Japan, wider retail access and the power of social media have put all sorts of professional-grade hair products into consumers' hands, fueling this DIY movement.
But just because you can buy it doesn't mean it's a quick and easy process. You need to block out a serious chunk of time—I’m talking at least 4-6 hours—where you won't be rushed or disturbed. This is a game of patience and precision. Rushing through the application, not spreading the product evenly, or using a flat iron that’s too hot can lead to patchy, uneven results or, worse, fried hair. The goal is silky, not scorched.
To keep your hair healthy in the long run, it helps to understand the philosophy behind Japanese haircare. Diving into a complete Japanese hair care routine can give you incredible insight into the products and rituals that keep hair strong and vibrant. Think of this straightening process as one major event within a broader commitment to hair health.
Assembling Your At-Home Straightening Toolkit
To get professional-quality Japanese hair straightening at home, you need to think like a stylist. That means setting up your station with every tool you'll need before a single drop of product touches your hair. Trust me, improvising isn't an option here—having the right gear is the very first step toward a successful, damage-free result.
Think of this as your mission-critical pre-flight checklist. Each item has a specific job to do, ensuring safety, precision, and incredible results. Gathering everything beforehand lets you focus entirely on the delicate application process without that mid-process panic of scrambling for a missing clip or bowl.
The Core Chemical Components
At the heart of your toolkit is the two-part chemical system. This isn't just one product, but a powerful duo that works in tandem to completely transform your hair's texture. You simply can't have one without the other.
-
The Activator (Reducer): This is the first solution that goes on your hair. Its one and only job is to break down the disulfide bonds within each strand—these are the bonds that give your hair its natural curl or wave. This step makes your hair pliable and ready to be reshaped into a new, straight form.
-
The Neutralizer: After the activator has done its work and you’ve meticulously flat-ironed your hair, the neutralizer comes in to finish the job. This second solution rebuilds those disulfide bonds in their new, straight formation, effectively locking your style in place permanently.
Choosing a quality kit from a trusted source like Buy Me Japan is absolutely essential. The formulation can make a world of difference in your final result and, more importantly, the long-term health of your hair.
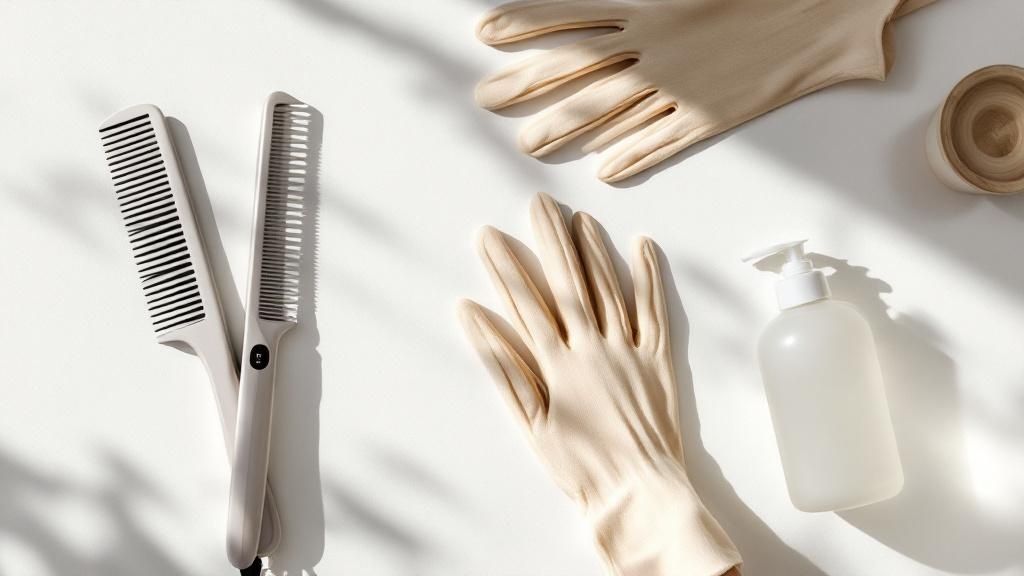
Essential Preparation and Application Tools
Beyond the chemicals themselves, a very specific set of tools is required to apply everything safely and evenly. Using the wrong materials isn't just a small mistake; it can compromise the entire process.
-
Clarifying Shampoo: You’ll start your day by washing your hair with this. It strips away all product buildup, oils, and impurities, creating a perfectly clean canvas for the chemicals to penetrate evenly. Your regular shampoo just won't cut it for this step.
-
Protective Gloves: These are completely non-negotiable. The chemicals used are potent and can seriously irritate your skin. A sturdy pair of nitrile gloves will keep your hands safe from start to finish.
-
Non-Metallic Bowl and Brush: This is a crucial detail many people overlook. The straightening chemicals can react with metal, which can mess with the formula's effectiveness and even cause damage. Always, always use a plastic or glass bowl and a tint brush with synthetic bristles.
-
Plastic Hair Clips: You'll need several of these to section your hair neatly. Working in small, manageable sections is the secret to a flawless, even application, and good clips will keep the rest of your hair safely out of the way.
-
Protective Cape or Old Towel: Drape this over your shoulders to protect your clothes and skin from any accidental drips or splashes.
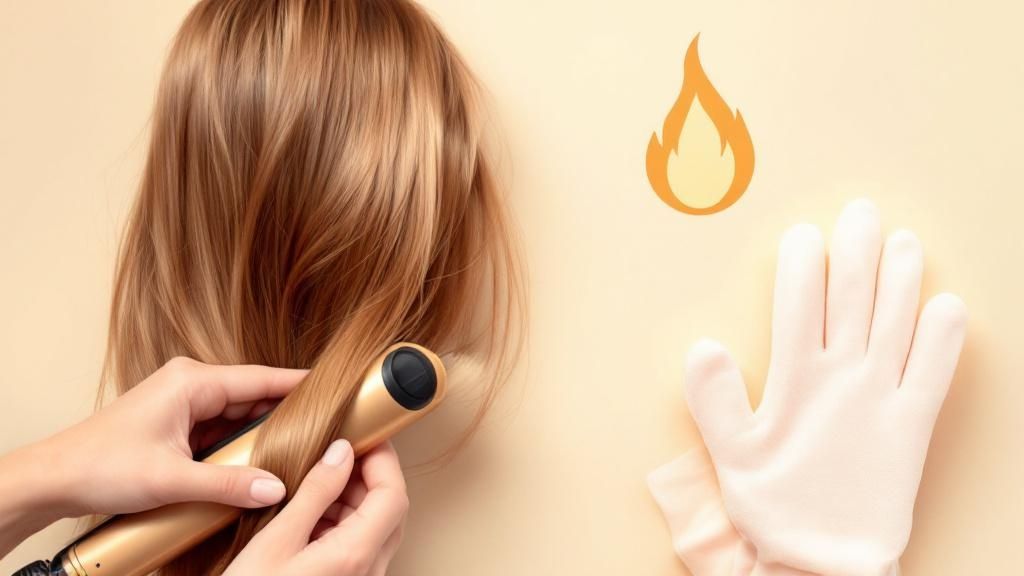
The All-Important Heat Styling Equipment
The heat application stage is where the magic of "thermal reconditioning" really happens. The quality of your flat iron is every bit as important as the chemical kit you choose.
A cheap, basic flat iron from the drugstore simply won’t do the job. You need a high-quality tool with ceramic or titanium plates and, most importantly, precise temperature control. Here’s why this matters so much:
- Even Heat Distribution: Ceramic and titanium plates distribute heat perfectly evenly, preventing dangerous "hot spots" that can scorch and permanently fry your hair.
- Temperature Precision: You have to maintain a consistent temperature (usually around 356°F or 180°C) to effectively seal the hair cuticle without causing irreversible heat damage. An iron with a digital display is your best friend here.
A professional-grade flat iron is an investment not just for this process, but for the long-term health of your hair. It provides the controlled, consistent heat necessary to lock in your new straight texture without the damage.
Finally, a good quality blow dryer is also a must-have for the steps between chemical applications. Having all these items laid out and ready to go will make your Japanese hair straightening experience at home smoother, safer, and infinitely more successful.
The Hair Straightening Application Process
This is it—the part where all your careful prep work starts to pay off. The application itself is a precise, methodical process that really needs your full attention. We’re going to walk through every stage, from the first solution to the final rinse, breaking it all down into simple, manageable steps.
Forget trying to make sense of those confusing package inserts. I want this to feel like your personal guide, filled with the kind of hands-on tips that turn good results into great results. With your tools laid out and your hair ready, it’s time to get started.
Initial Hair Preparation
Your journey to sleek, straight hair kicks off right at the sink. First thing's first: you need to wash your hair thoroughly with a good clarifying shampoo. This isn't the moment for your usual moisturizing wash; a clarifying formula is designed to strip away every last trace of oil, silicone, and product buildup.
Think of it as creating a perfectly clean canvas. This step ensures the straightening solution can penetrate every single strand evenly. After washing, gently towel-dry your hair, and then blow-dry it until it's 100% bone-dry. Don’t even think about adding any leave-in conditioners or styling products. Perfectly clean, dry hair is non-negotiable for getting uniform results.
Applying The First Solution: The Activator
With your hair prepped, it's time to work with the activator solution. Slip on your protective gloves and pour it into your non-metallic bowl. You'll want to part your hair neatly into four equal quadrants—two in the front, two in the back—and use your plastic clips to keep them separated.
Work with one quadrant at a time, taking small, thin subsections of hair that are about a half-inch wide. Using your application brush, paint the activator solution on from roots to ends, but make sure to stop about a half-inch away from your scalp.
Crucial Tip: Never let the activator touch your scalp directly. The chemicals are potent and can cause some serious irritation or even minor chemical burns. Leaving that small gap is key for protecting your skin and also helps create a more natural, less flat-looking result at the roots.
You want to fully saturate each subsection on both sides, but don't overdo it to the point where it's dripping everywhere. The goal is complete, even coverage. As you finish a section, just leave it hanging straight and move on to the next one until your entire head is done. For a deeper dive, our DIY expert tips for Japanese straightening at home offer even more insights.
Processing and Rinsing
Once the activator is on, the waiting game begins. This is where your strand test from earlier really proves its worth. Processing time can vary wildly depending on your hair's texture and condition—it could be as quick as 20 minutes for fine hair or stretch over an hour for coarse, stubborn hair.
Every 5-10 minutes, you need to check your hair's elasticity. Gently take a single strand and give it a little pull. If it stretches like a gummy, elastic band without snapping, you're ready.
When the time is up, head back to the sink. Rinse your hair with lukewarm water for at least 5-7 minutes to get every last bit of the activator out. Do not use shampoo. Your hair is in a very fragile state right now, so be gentle. After rinsing, carefully squeeze out the excess water and then blow-dry your hair completely straight, using a paddle brush to guide it.
The Meticulous Flat Ironing Stage
This is the "thermal reconditioning" step, and it’s the most critical part for locking in your hair’s new, straight shape. You’ll need a high-quality flat iron set to the right temperature—usually around 180°C (356°F). You might need to adjust this down if your hair is fine or has been processed before.
The absolute key to success here is working in paper-thin sections. Take a small piece of hair and pass the flat iron over it slowly and deliberately, from roots to ends. If your iron is hot enough and your sections are thin enough, you should only need one or two passes. Don’t move on until every section is perfectly silky and straight.
The demand for at-home beauty treatments has spurred amazing innovations in styling tools. The global hair straightener market is growing, partly thanks to portable and cordless models perfect for our busy lives. While North America has been the biggest market, the Asia-Pacific region is catching up fast as younger consumers become more beauty-conscious. You can learn more about these trends in this detailed hair straightener market report.
This trend just goes to show how important it is to invest in quality tools, like a reliable flat iron, when doing your japanese hair straightening at home.
Neutralizing to Finalize the Style
After every single strand has been ironed perfectly straight, you're ready for the final chemical step. The neutralizer comes in to rebuild your hair's internal bonds in their new, straight structure. This is what locks everything in place for good.
Applying the neutralizer is a lot like applying the activator. You'll carefully coat each section of your straight hair, making sure it’s completely saturated from root to tip. This time, however, you have to keep your hair perfectly straight while it processes. Don’t clip it, bend it, or tuck it behind your ears. Just let it hang.
Follow the kit’s instructions for how long to leave the neutralizer on; it’s usually much shorter, often around 10-15 minutes.
Once the timer goes off, it's time for the final rinse. Wash the neutralizer out thoroughly with lukewarm water for several minutes. Follow this up with the deep conditioning treatment from your kit or another high-quality, protein-free moisturizing mask. Let that conditioner sit for 5-10 minutes to restore moisture and seal the hair cuticle.
After this final step, give your hair one last rinse, and you're officially done with the chemical process. You can let it air-dry or gently blow-dry it on a low setting to finally see your brand-new, permanently sleek hair.
Mastering Aftercare for Healthy Straight Hair
You’ve done it. After hours of careful application, rinsing, and ironing, you're finally looking at the sleek, glass-like hair you’ve been dreaming of. But the work isn't quite over.
Believe it or not, the next 72 hours are probably the most important part of the entire process. This is the period where your hair's newly formed bonds are at their most vulnerable. What you do—and more importantly, what you don't do—will lock in your results for the long haul.
Think of your hair like wet cement that's still setting. Any pressure, crease, or moisture can leave a permanent mark.
The Critical First 72 Hours
For the next three days, you need to be incredibly gentle with your hair. This means a strict hands-off policy. Anything that bends, creases, or gets your hair wet is completely off-limits until the new bonds have fully stabilized.
Here are the non-negotiable rules for this crucial window:
- No Washing: This is the golden rule. Do not let water touch your hair. Any moisture can interfere with the neutralizing process and ruin your perfect straightness.
- No Tying or Clipping: Avoid ponytails, buns, clips, bobby pins, or even headbands. Anything that puts a dent or crease in your hair could become a permanent fixture.
- No Tucking: This one is surprisingly tough to remember, but don’t tuck your hair behind your ears. Just let it hang freely.
- No Sweating: Try to avoid intense workouts or situations that cause heavy sweating. The salt and moisture can mess with your freshly treated hair.
Expert Tip: Protect your hair while you sleep by switching to a silk or satin pillowcase. It minimizes friction and helps prevent any accidental kinks from forming overnight.
Building Your Long-Term Care Routine
Once you’ve made it past the 72-hour mark and had that first glorious wash, your focus shifts to long-term maintenance. The hair you treated is now permanently straight, but it will need a different kind of care to stay healthy, hydrated, and strong. Your old routine just isn't going to cut it anymore.
The chemical process can leave hair thirsty for extra moisture, so your choice of products is now critical. You’ll need to switch to a gentle, supportive regimen that nourishes your hair without stripping it.
A sulfate-free shampoo and conditioner should be the new cornerstone of your routine. Sulfates are harsh detergents that can strip away your hair’s natural oils, leaving chemically treated strands feeling dry and brittle. A gentler formula cleanses just as effectively while preserving that essential moisture.
Weekly deep conditioning masks are also your new best friend. Look for intensely hydrating treatments to replenish moisture and keep your hair feeling soft and looking glossy. To truly maintain the integrity of your hair, it helps to understand how to strengthen hair follicles for overall healthier hair, which is key to preventing future breakage.
This simple table breaks down the essential do's and don'ts for the first month to keep your hair in perfect condition.
Post-Treatment Care Schedule
| Timeframe | Do | Don't |
|---|---|---|
| First 72 Hours | Let hair hang loose; use a silk pillowcase. | Wash, tie, clip, tuck behind ears, or sweat. |
| Week 1 | First wash with sulfate-free shampoo; be gentle. | Use harsh shampoos or heavy styling products. |
| Weeks 2-3 | Start weekly deep conditioning treatments; use heat protectant if needed. | Over-style with heat; neglect conditioning. |
| Week 4 & Beyond | Continue with your gentle routine; assess roots for new growth. | Forget to protect hair from sun and chlorine; skip regular trims. |
Following this schedule helps ensure your hair recovers beautifully and your results last as long as possible.
Managing Regrowth and Heat Styling
While the treatment is permanent on the hair it was applied to, your hair will, of course, keep growing. In a few months, you'll start to see your natural texture reappearing at the roots, creating a contrast with your pin-straight lengths. This is totally normal.
For many, this is where heat styling comes back into play, though on a much smaller scale than before. The DIY beauty trend has led to a boom in specialized tools, and the global mini hair straightener market is now valued at USD 3 billion. These smaller irons are perfect for targeting just the new growth at the roots without having to re-iron your entire head.
Whenever you use heat, a quality heat protectant spray is non-negotiable. It creates a barrier between your hair and the hot plates, preventing the kind of damage that leads to split ends and breakage.
If you're concerned about new growth, our guide on Japanese hair growth products has some fantastic options to keep it as healthy as possible. Most people find they need a root touch-up every 6-12 months, depending on how fast their hair grows and the difference in texture.
Troubleshooting Common At-Home Mistakes
So, you've followed every instruction down to the letter, but something still feels a little... off. Don't panic. Even with the most careful application, little hiccups can happen during an at-home Japanese hair straightening session. The good news is that most of them are fixable.
Think of this as your go-to guide for those less-than-perfect moments. We’ll walk through the most common issues, from stubborn wavy patches to that dreaded "gummy" feeling, and give you clear, actionable advice to get your hair back to beautiful.
Diagnosing Uneven or Patchy Results
This is probably the most frequent issue people run into: some sections are perfectly pin-straight, while others stubbornly hold onto a wave. In my experience, this almost always points back to an issue with either the application of the product or the heat from the flat iron.
More often than not, the culprit is one of these things:
- Inconsistent Application: You might have missed a few spots, not fully soaking every single strand with the activator or neutralizer.
- Sections Were Too Thick: When you're flat ironing, if your sections are too chunky, the heat just can't get through to the middle. This is a classic rookie mistake.
- Rushed Ironing: Moving the flat iron too quickly over an area doesn't give it enough time to properly seal the cuticle and lock in that straightness.
For a few minor wavy spots, you can sometimes do a careful spot-treatment with the flat iron. But if you're dealing with large, noticeably wavy sections, do not re-apply the chemicals. You'll need to wait several months before it's safe to try another full treatment. For now, focus on deep conditioning and make a mental note to be extra meticulous next time.
When Hair Feels Gummy or Overly Stretchy
Okay, this is the big one. If you rinse your hair and it feels weirdly soft, mushy, or like a wet noodle, that’s a major red flag. This gummy texture means your hair has been over-processed. The chemical bonds were broken down too far and couldn't reform correctly.
This almost always happens when the activator solution is left on for too long. It's the most serious mistake you can make because it signals significant damage to the hair's core structure.
Immediate Action Required: If your hair feels gummy, consider it a hair emergency. Stop what you're doing. Do not apply any more heat. Your only goal right now is damage control. Gently rinse with cool water and immediately apply a protein-heavy deep conditioner or a bond-building treatment.
Over-processed hair is incredibly fragile and will break easily. You have to baby it for the next few weeks. That means no heat styling, lots of restorative hair masks, and being unbelievably gentle when you brush. You can find some fantastic repair-focused options among the best Japanese hair products for shiny locks.
When the Finish Is Not Silky or Sleek
What if your hair is straight, but it's missing that signature, glass-like shine of a professional job? If it looks a little dull or feels rough to the touch, the problem likely lies with your flat iron technique or the final conditioning step.
A flat iron that isn't hot enough—or worse, one with hot and cold spots—won't properly seal the cuticle. An unsealed cuticle looks dull, not glossy. Likewise, if you rush or skip the final deep conditioning treatment after neutralizing, you haven't put back the moisture that the process stripped out.
The fix here is all about aftercare. Start using a hydrating mask once a week and add a lightweight hair serum or oil to your ends to bring back that shine. For your next attempt, make sure your flat iron is set to a steady 180°C (356°F) and work in paper-thin sections. That’s the real secret to getting a perfect seal on every single strand.
Frequently Asked Questions
Even after walking through the whole process, it's totally normal to have a few questions pop up. Let's tackle some of the most common things people ask before they get started, so you can go into this feeling completely confident.
How Long Will My At-Home Japanese Straightening Last?
This is the big one, and the answer is both simple and a little complex. The treatment permanently changes the structure of the hair it touches. That means the straightened sections will stay straight forever—it won't ever wash out or fade away.
The real factor you'll be managing is new growth. Your roots will come in with your natural texture, which will eventually create a contrast. Most people find they need a root touch-up every 6 to 12 months, but this really depends on how fast your hair grows and how wavy or curly it is naturally.
Can I Color My Hair Before or After This Treatment?
It’s crucial to treat coloring and straightening as two separate, major events for your hair. Trying to do them too close together is a surefire way to cause some serious damage.
As a golden rule, leave at least two weeks between coloring and straightening, no matter which you do first. If you have to choose, coloring your hair a few weeks after the straightening is usually the safer move. Why? The straightening chemicals can sometimes lift your current color a bit, so coloring afterward makes sure your shade is exactly what you want.
What Happens If The Straightening Cream Touches My Scalp?
You definitely want to do everything you can to avoid this. The activator is powerful and is only meant for your hair, not your skin. If it makes direct contact with your scalp, it can cause anything from mild irritation and redness to a minor chemical burn.
If a little bit gets on your skin by accident, just wipe it off immediately with a damp towel. This is exactly why applying the solution about a half-inch away from the scalp is such a non-negotiable step. If you ever feel a persistent burning sensation, stop what you’re doing and rinse the area thoroughly with lukewarm water.
Key Takeaway: That half-inch buffer zone is your best friend. It not only protects your scalp but also gives your finished style a more natural look with a bit of lift at the roots, avoiding that "helmet head" effect.
Is It Realistic To Do This Entirely By Myself?
Honestly, for your first time, trying to do this completely alone is incredibly difficult, and I wouldn't recommend it. The process demands a lot of precision, especially with timing and application. Getting the back of your own head perfectly even is next to impossible when you can't see what you're doing.
Your best bet for a flawless japanese hair straightening at home result is to enlist a patient friend to be your second pair of hands. If you walk them through the instructions, having someone else apply the product for you will massively boost your chances of getting that sleek, salon-quality finish you're after. This dedication to careful, gentle application is a cornerstone of Japanese haircare, and you can learn more about why Japanese haircare is so good by exploring its focus on thoughtful, effective routines.
Ready to get the smooth, pin-straight hair you've been dreaming of? Check out the authentic, high-quality Japanese hair straightening kits at Buy Me Japan and start your transformation today.

Share:
Best Skincare Products Japan You Need to Try
Best Japanese Anti Aging Serum for Youthful Skin