


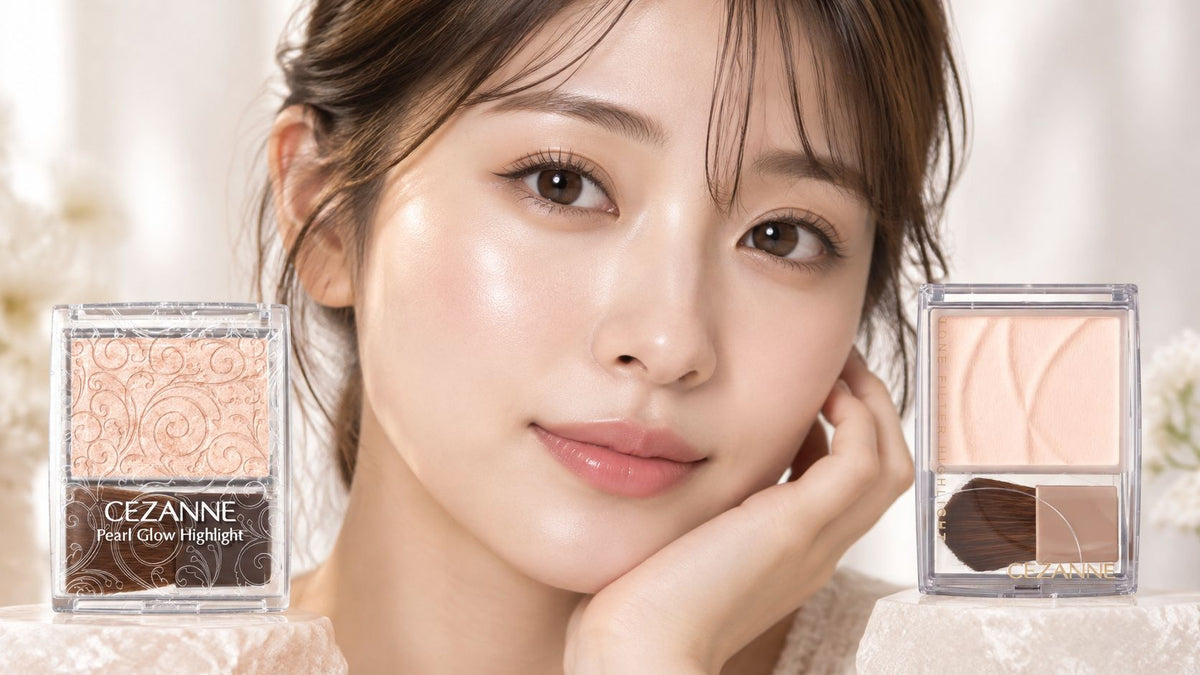
You have both compacts on the desk, base makeup done, and about four minutes before you leave. One pan throws a glassy light the second it hits your cheekbone. The other disappears into the skin and only shows up as a cleaner, brighter tone. That is the Cezanne Pearl Glow vs Tone Filter Highlight choice, and it is about finish and placement, not about which compact is “better quality.”
If the light should be obvious in a photo, you want pearls. If dullness, redness, or texture is what you notice first in daylight, you want the filter. Plenty of faces need both, on different zones.
Cezanne Pearl Glow vs Tone Filter at a Glance
Quality is a wash between these two Cezanne powder highlighters, so choose on finish. Cezanne Pearl Glow Nuance Highlighter is the radiant compact: dense, high-brightness pearls in a 2.4 g pressed pan with a brush, across five shade directions. Cezanne Tone Filter Highlight is the controlled compact in two shades, 01 Filter Beige and 02 Filter Pink, and its 2.3 g pan holds roughly 4.2% less powder by weight than Pearl Glow's 2.4 g. That gap is too small to matter. Placement and finish decide this purchase.
Filter Beige is the neutral brightener, while Filter Pink gives a fresher, rosier cast. Pearl Glow's five shades run through champagne, rose, mint, shell pink and moon beige, so you can push the light cooler, warmer or pinker on purpose.
| Feature | Cezanne Pearl Glow Highlight | Cezanne Tone Filter Highlight |
|---|---|---|
| Finish | Wet-look radiance from dense, high-brightness pearls | Soft-focus, filtered brightness with minimal shine |
| Shades | 5: 01 Champagne Beige, 02 Rose Beige, 03 Aurora Mint, 04 Shell Pink, 05 Moon Beige | 2: 01 Filter Beige, 02 Filter Pink |
| Pan size | 2.4 g with brush | 2.3 g |
| Catalog price | $8.41 | See the product page for current pricing |
| Best zones | Smooth high points: cheekbones, brow bone, cupid's bow | Dull, red or textured areas that need quiet brightness |
Read the table as a finish map, zone by zone. Pink shades make a face look livelier, and beige shades blend more naturally into skin. Pearl Glow's mint and pink pearls shift the color of the light along with its intensity, so shade choice changes perceived strength more than the compact name does.
Practical rule: Shortlist with the table, then decide zone by zone: visible sheen where skin is smooth, filtered brightness where texture shows.
If you are still sorting Japanese powder brands by texture rather than by logo, the Canmake and Cezanne comparison is a useful companion read before you commit to a finish.
Verdict: choose Pearl Glow for visible, wet-look radiance on smooth high points, and Tone Filter for diffused, filtered brightness on dull or textured areas.
Cezanne Pearl Glow Highlight Finish and Shades
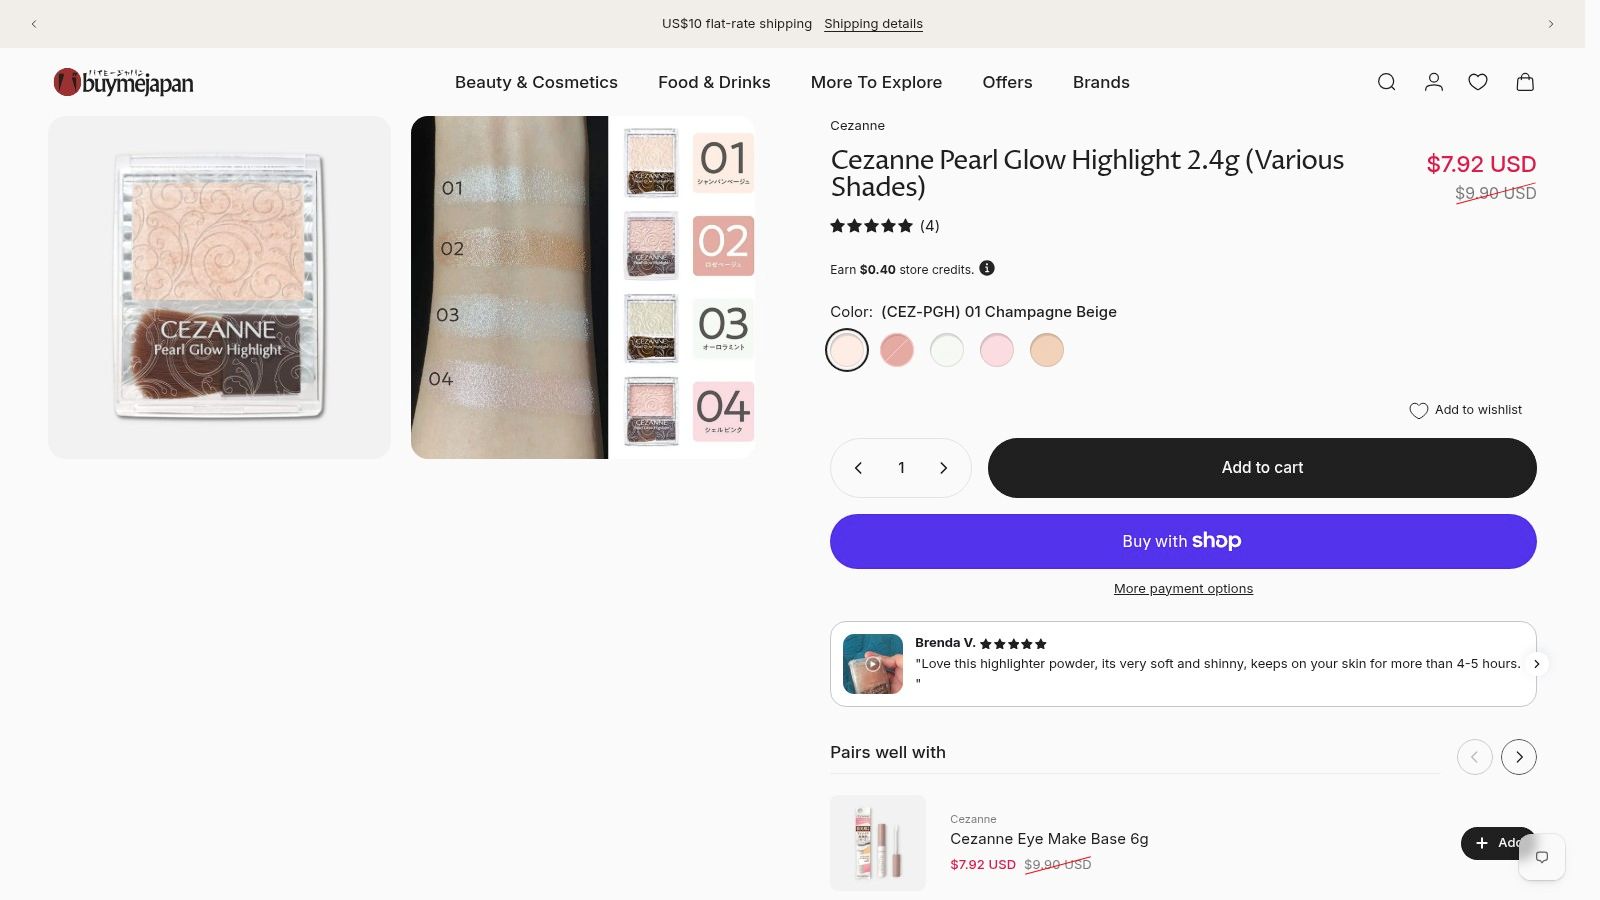
Pearl Glow is the compact you pick when the highlight should be seen. Dense, high-brightness pearls give a polished, surface-wide sheen rather than separate glitter flecks sitting on the skin. On a smooth cheekbone it reads dimensional, almost glossy, while the base of the powder stays closer to satin than to chunky sparkle.
Cezanne's official page lists the compact at ¥748 including tax, and the Buy Me Japan Pearl Glow catalog page prices it at $8.41. The current format is 2.4 g of pressed powder with a brush in the compact. The formula has been on the market for years, which is part of why the shade range is easy to shop: the finish is a known quantity.
How the five shades read
- 01 Champagne Beige and 05 Moon Beige: Everyday neutrals. Champagne leans slightly golden. Moon Beige sits closer to skin.
- 02 Rose Beige and 04 Shell Pink: Warmer, fresher casts. Reach for these when a neutral highlight looks flat and you want the high point to feel livelier.
- 03 Aurora Mint: Cool clarity from shifting pearls. It can make a warm base look clearer, and it can also look costume-y if you pack it on.
Match the pearl color to the makeup around it. A mint pearl over a very warm blush fights the cheek. A shell pink over a cool base can read as extra blush rather than light.
What the Pearl Glow label lists
The label lists several moisturizers alongside the pigments, and the ingredient section below reads that list by skin type. Here, the only thing to hold onto is this: a pressed powder sits on top of skincare rather than replacing it, so treat the label as a comfort claim, not a hydration promise.
If the quieter, tone-adjusting compact is the one you need for dull areas, Cezanne Tone Filter Highlight 2.3g is the other powder in this pair, built to brighten without that pearl stripe.
Where the pearls belong
Keep Pearl Glow on smooth high points: the tops of the cheekbones, the bridge of the nose, and the chin. Evening makeup and photography are the easy yes. Office mornings usually are not, unless you use a very thin layer of a neutral shade.
Run a quick texture test before you commit. Smile in daylight and look at the zone you plan to light: if the surface stays smooth, it can take pearl; if pores or fine lines show through, the reflective particles will spotlight them. Keep heavy pearl away from the sides of the nose and any area where texture already reads.
A second heavy pass makes this compact less discreet than a soft-focus powder, so build it the other way. Tap on a thin layer, look in daylight, then decide if you need more.
The same "which format matches the job" thinking shows up in this guide to choosing between powder, cream, and UV formats. Finish first, shade second.
Cezanne Tone Filter Highlight Finish and Shades
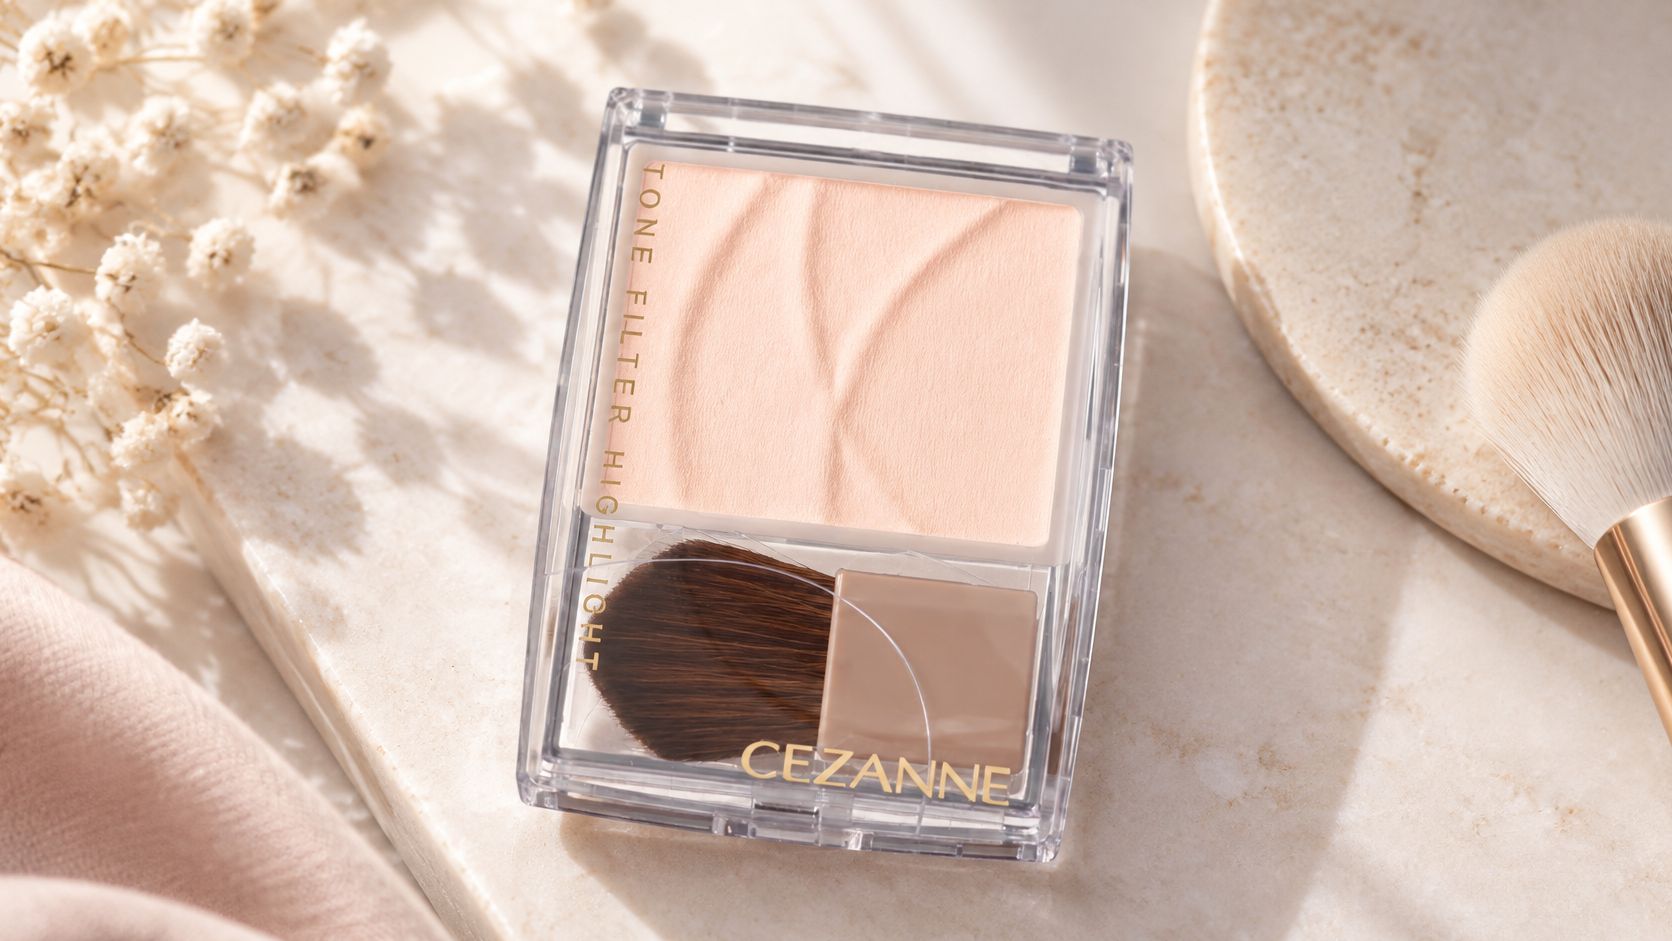
Cezanne Tone Filter Highlight is the restrained compact of the pair: a powder highlight built for areas that look dull. Cezanne describes the powder as soft and smooth, and as fitting closely to the skin. On the face that reads as filtered brightness: a more even-looking tone, with less obvious shine than a pearl highlight.
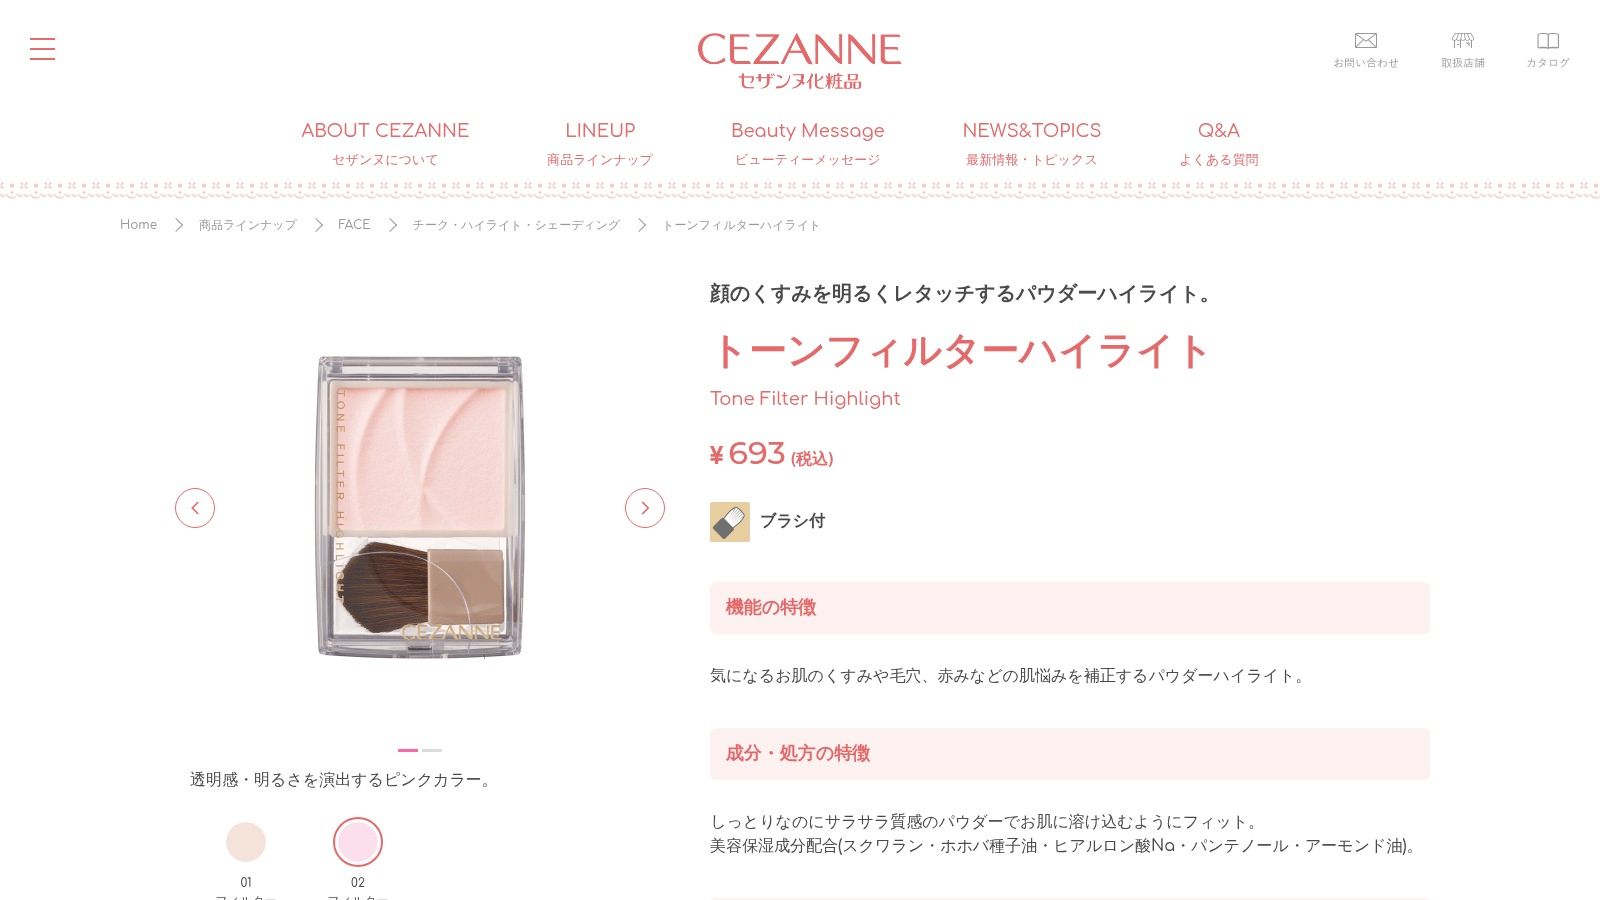
The official Cezanne Tone Filter page lists two shades, and the descriptions are specific enough to shop from.
- 01 Filter Beige is a light beige intended to suit a broad range of skin tones. Start here when you want brightness without adding a color story.
- 02 Filter Pink creates an impression of greater clarity and brightness, and it can make the center of the face look fresher. It can also read as blush if your base is already rosy, so check it in daylight before you commit.
What you see, and what you should not expect
The effect is optical. Dullness looks softer and shadows look less heavy because the powder scatters light gently instead of laying down one bright stripe. Redness and the look of pores draw less attention for the same reason. What the powder cannot do is treat the cause of any of it. It sits on top of skincare and base, changing how the zone reads rather than changing the skin.
A filter powder should vanish into foundation. If you can draw a line with it, you have used too much, or you have picked up the pearl compact by mistake.
There is a limit to how hard you should lean on marketing here. Available formula descriptions do not include standardized lab numbers for reflectance, wear time, or particle size. The comparison rests on the ingredient order, the finish language, and where you place the powder. It is not a tested performance ranking. Ingredient presence also does not prove a moisturizing or wear advantage. If a brand lists oils, you know those oils are in the pan. You do not know they will change how your skin feels after six hours.
Who should default to this finish
Choose Tone Filter when the sentence in your head is "my face looks flat." It pairs well with a thin base and a cheek color you want to keep soft, because it adds light without competing texture. If you are still deciding between cream and powder for the cheek itself, this guide to cream cheek versus powder cheeks will keep the two finishes from fighting each other.
Pick this compact when you want the complexion to look brighter and more even. Pick Pearl Glow when you want light you can point at.
Reading the Ingredient Lists for Your Skin Type
Read both lists for the same two things: what is in the pan, and roughly how much of it. That is all a label gives you, so match the ingredient roles below to your own skin before the finish language sways you.
| Ingredient | Found in | Role | Label note |
|---|---|---|---|
| Sodium hyaluronate | Both | Humectant that helps hold moisture on the skin surface | Listed in both; check your own sensitivities |
| Squalane | Both | Lightweight emollient | Listed in both formulas |
| Jojoba seed oil | Both | Emollient with a skin-like feel | Listed in both formulas |
| Ceramide NP | Pearl Glow | Lipid listed for moisture-barrier support | Listed in Pearl Glow only |
| Shea butter | Pearl Glow | Rich emollient | Richer texture; check the label if you prefer lighter formulas |
| Lavender, rosemary and chamomile flower extracts | Pearl Glow | Botanical extracts | Fragrant botanicals may irritate reactive or acne-prone skin in some people; patch test first |
| Panthenol | Tone Filter | Pro-vitamin B5 humectant | Listed in Tone Filter only |
| Almond oil | Tone Filter | Emollient oil | Nut-derived; avoid if you have a known nut allergy |
| Silica and boron nitride | Tone Filter | Soft-focus powders that help blur shine and texture | Inert powders; individual tolerance varies |
| Mica, titanium dioxide, tin oxide, borosilicate pearls | Pearl Glow | Reflective pearl system | Heavy shimmer can emphasize pores and fine lines when over-applied |
Where the formulas split
The meaningful split sits on Tone Filter's side of the list. Silica and boron nitride are the blurring powders behind its soft-focus claim, and they tend to sit toward the front of that style of list, with dimethicone and nylon-12 supporting glide and optical blur. Panthenol adds a second humectant on top of the sodium hyaluronate both powders share, and almond oil rounds out the emollient side.
For oily or breakout-prone skin, that profile is the safer read on paper. Silica and boron nitride blur without laying down a heavy pearl film, so pores are less likely to catch the light. For dry skin, neither list gives a reason to reject either compact, because the shared humectant and emollients appear in both. The row that deserves real attention is almond oil. Skip Tone Filter entirely if you have a known nut allergy, or confirm the current box with a clinician you already trust.
Reactive skin should weigh the fragrant botanicals in the Pearl Glow rows. They are part of the formula, and in some people lavender, rosemary, or chamomile extracts trigger exactly the redness a highlighter sits on top of.
How to read the list without the marketing
Ingredients are generally listed in descending order of concentration. A humectant near the end of a powder list is present in a small amount. Ignore phrases that make a powder sound like a serum, and check the INCI names against triggers you already know rather than against the claims on the box.
Nothing on either label treats, cures, or diagnoses a skin condition. The powders change how light sits on makeup.
A patch test worth doing
- Apply a small amount to the inner arm or along the jawline, on clean skin.
- Leave it on. Do not cover it with a dozen other new products the same day.
- Watch for 24 to 48 hours before you wear it across the face.
If you are choosing powders for skin that shows more lines, the placement ideas in this piece on Japanese makeup for mature skin line up with keeping shimmer off the zones that crease.
Where Each Highlighter Works and Which Shade to Pick
Map each compact to a face zone before you buy either one. Tone Filter covers the zones that carry dullness, shadows, or texture. Pearl Glow covers the smooth high points, where reflective shine lands clean and reads as dimension. Most faces look more finished when the two divide the work than when one powder tries to handle everything.
| Face zone | Better pick | Why |
|---|---|---|
| Tops of cheekbones | Pearl Glow | A smooth plane catches light, so reflective shine looks dimensional |
| Bridge of the nose | Pearl Glow | A narrow, polished highlight reads as intentional rather than glittery |
| Chin and cupid's bow | Pearl Glow | Small points of light sharpen the shape of the face |
| Under-eye area | Tone Filter | Soft-focus powder brightens shadows without settling into fine lines |
| Around the mouth | Tone Filter | Diffused brightness avoids shimmer collecting in smile lines |
| Textured or pore-prone cheeks | Tone Filter | Silica and boron nitride help blur pores rather than spotlight them |
| Centre of the forehead | Tone Filter, lightly | Brightens dullness where light hits directly without obvious shimmer |
Read the table as a texture rule. Shine flatters a smooth plane and spotlights every pore, line, and shadow it crosses, so the finish follows the surface rather than your preference for glow. Mature or textured skin can still wear Pearl Glow. Keep it on smooth planes. A high-shine finish over enlarged pores or fine lines is usually less flattering than the same powder on the top of a cheekbone.
A five-step order that avoids patchiness
- Let skincare and sunscreen absorb fully. A damp face grabs powder in streaks.
- Apply base makeup and let it settle. Cream products underneath need a minute before you press powder on top.
- Press Tone Filter over dull or textured zones with a tapered brush, then diffuse the edges so you cannot see a circle of product.
- Tap Pearl Glow onto the high points only. Build thin layers. Light pressure keeps the pearls from packing into pores.
- Check in daylight, or in the brightest window you have, before you add more.
The two can share a face because they do different jobs. Tone Filter adjusts the tone. Pearl Glow adds light on top of that. Let the first layer settle before the second, or the powders mix into a patchy film. Pressure matters as much as order. If you are unsure how much a sponge pushes product into skin compared with a brush, this guide to how to use a makeup sponge is worth reading before you press either powder through a damp sponge. A sponge sheers Tone Filter nicely and can also mash Pearl Glow into texture. Brush first until you know your pressure.
The texture test
Apply a little of each powder side by side on the outer cheek, in natural light, and do nothing else for a minute. Keep Pearl Glow off any zone where the shimmer settles into pores or fine lines. If the pearl side winks at every bump and the filter side just looks clearer, that cheek gets Tone Filter. You can still use Pearl Glow on the high point above it.
Buy Me Japan works to display product colors and images accurately, but your monitor decides the final rendering. Swatches on a screen are a starting point. The cheek test is the decision.
Shade picks by situation
Daytime or office makeup. Use 01 Filter Beige on its own across dull zones. Skip the pearl compact unless a single tap on the cheekbone disappears in the office light.
Evening or photos. Pearl Glow earns its place. 05 Moon Beige is the neutral glow. 02 Rose Beige adds warmth. 03 Aurora Mint is the cooler shift, and it shows more in flash, so use less than you think.
Textured or mature skin. Tone Filter is the default on cheeks, under the eyes, and around the mouth. Add Pearl Glow only on a smooth high point, in one thin layer.
Oily or acne-prone skin. Start with Tone Filter. If you trial Pearl Glow, limit it to cheekbone tops, and only after the patch test. Heavy pearls plus midday oil is how a highlight turns into a shiny patch.
For a first purchase, favor the neutrals: Filter Beige, Moon Beige, or Champagne Beige. Pink and mint are easier to judge once you know how much light your skin already reflects. Photograph swatches in natural light. Phone screens shift beige toward pink or gray, and that is enough to buy the wrong pan.
Pick Your Finish and Shop with Confidence
Decide by zone, not by which pan looks prettier on screen. If your face map calls for quiet brightness across dull or textured areas, buy Tone Filter first. If your high points are smooth and you want a glow that reads from a distance, start with Pearl Glow. Owning both only makes sense when your map places each finish in a different spot.
Then do the last check most shoppers skip: match the exact shade name on the product page to the zone you planned, and pass on any compact that is not the finish you tested on your cheek. Stock rotates, so check the current selection rather than assuming a shade is in.
When you are ready to order, Buy Me Japan carries Cezanne among its Japanese beauty brands, with secure checkout, detailed product reviews to cross-check shades, and customer service if a question comes up before you buy. First-time shoppers who sign up get a 10% off coupon, so claim that before you pick between the compact that belongs on your face and the one that merely looks brightest in the pan.

Share:
La Sana Hair Essence Moist vs Smooth: Which Finish Suits Your Routine?